Hours of perfect iPhone footage can fall flat without quality audio. Whether creating social media content, tutorials, or marketing videos, adding a professional Voice over transforms amateur footage into polished content. The best AI voice generator app options and proper techniques make studio-quality narration possible right from your phone. Recording a professional Voice over on iPhone takes just 10 minutes with the right approach to microphone placement and audio editing.
Streamlining the entire process saves even more time and effort. Rather than juggling separate recording, syncing, and editing steps across multiple apps, content creators can handle voice recording and video editing in one place while maintaining professional quality. This approach lets creators focus on delivering clear, confident messages with Crayo's clip creator tool.
Table of Contents
- Why Recording Voice over on iPhone Feels Hard
- The Hidden Cost of Recording Voice over the Wrong Way
- 7 Practical Steps to Record a Professional Voice over on iPhone in 10 Minutes
- How to Optimize Your iPhone Voice over for YouTube Growth
- Create Your First YouTube Voiceover in 15 Minutes (With Crayo AI)
Summary
- Recording a professional Voice over on an iPhone isn't hard because the hardware is weak. It's hard because most creators record in uncontrolled environments without understanding how microphones capture sound. Modern iPhones have sensitive built-in mics that expose background noise, room echo, and ambient hum that you don't consciously hear. The gap between what felt like a quiet room during recording and what sounds hollow during playback discourages beginners who assume they need expensive studio equipment when the real issue is environmental awareness and technique.
- Poor audio quality silently erodes viewer trust and shortens watch time even when your video content is strong. Viewers tolerate average visuals but rarely tolerate poor audio, as unclear sound creates cognitive load that makes listening mentally exhausting. By minute five, retention curves drop faster for creators with room echo and background noise compared to those with clean audio, and the algorithm notices this gap. This perception of lower production quality also weakens your authority and causes brands to hesitate on partnership opportunities you'll never hear about.
- YouTube's algorithm heavily weighs retention in the first 30 seconds, making your opening Voice over hook critical for distribution. Videos that start with generic greetings like "Hey guys, welcome back" lose momentum before the actual content begins, while strong outcome-focused statements improve watch time and session duration. Creators who trim dead air, remove vocal hesitation, and match voice energy to visual cuts see measurably better engagement because modern viewers are conditioned for tight pacing. Even 20 two-second pauses across a 10-minute video add up to 40 seconds of dead air, leaving viewers to question whether to stay or click away.
- Recording full paragraphs instead of sentence fragments produces more natural-sounding Voice overs with a consistent tone and energy. Fragmented recording creates disjointed audio because your delivery shifts slightly between takes, your microphone position might drift, and stitching together ten three-second sentences takes longer than re-recording one 30-second paragraph. The Voice over industry is projected to grow at a CAGR of 6.5% from 2023 to 2030, according to industry analysis, reflecting increased demand for professional audio quality across all digital content as brands become more selective about production standards.
- Environmental control matters more than equipment quality for iPhone Voice overs. Recording five seconds of silence before speaking reveals background noise you might not consciously hear and provides a clean room tone for editing transitions. Small rooms with soft surfaces, like closets full of clothes, produce tighter, more controlled audio than spacious bedrooms with bare walls, because fabric absorbs sound reflections while hard surfaces amplify echo. Positioning your iPhone 6 to 12 inches from your mouth at chin level and using Airplane Mode to eliminate notification sounds prevents the technical issues that force creators to waste 45 minutes re-recording what should take 10.
- Crayo's clip creator tool addresses this by automating voice generation, pacing adjustments, and music layering in a single interface, rather than requiring creators to manage recording, noise reduction, and audio syncing across multiple apps.
Why Recording Voice over on iPhone Feels Hard
Recording a professional Voice over on an iPhone feels hard because most people confuse having a microphone with having a recording system. The phone is powerful, but without the right setup, environment, and technique, it exposes mistakes instead of hiding them. You're not lacking equipment. You're lacking awareness of how sound actually works.
🎯 Key Point: Your iPhone has the hardware to capture professional audio, but it requires understanding acoustic principles and proper technique to unlock its potential.
"The difference between amateur and professional recordings isn't the equipment—it's the understanding of how sound waves interact with your recording environment."
⚠️ Warning: Without addressing background noise, room acoustics, and microphone positioning, even the most expensive equipment will produce disappointing results.
Why does iPhone audio capture so much background noise?
Modern iPhones have surprisingly high-quality built-in microphones. That sounds like an advantage until you realize they capture everything: air conditioner hum, fan noise, keyboard tapping, room echo, mouth clicks, breathing. Because the mic is so sensitive, beginners hear background noise for the first time and assume their voice isn't good enough or that they need expensive studio equipment. The issue is rarely your voice. It's uncontrolled sound.
What do users report about iPhone recording quality?
According to the Apple Community Discussion Thread from December 2024, users consistently report frustration with iPhone audio recording because environmental noise becomes painfully obvious during playback. What felt like a quiet room while recording reveals itself as a symphony of hums, echoes, and ambient interference. The phone doesn't lie. It just tells the truth louder than you expected.
Most People Record in Echoey Rooms Without Realizing It
When you speak in an empty room, sound waves bounce off the walls and ceilings. This creates echo and reverb. To you, it sounds normal. To a microphone, it sounds hollow. Recording in a bedroom with bare walls creates an echo. Recording near windows increases reflection. Large rooms make voices sound distant. So the playback feels amateur, even if your voice is clear. That gap between expectation and playback quality is discouraging.
There's a Belief You Need Expensive Gear
Many creators hesitate because they believe you need a studio mic, a soundproof room, advanced audio software, or that iPhone audio isn't professional. This belief exists for a reason. High-end YouTubers and podcasters use XLR microphones, audio interfaces, acoustic panels, and professional DAWs. So beginners assume that without those tools, quality is impossible.
But here's what most people miss. Many viral YouTube videos, TikToks, and Instagram reels were recorded on smartphones, just with better technique. The problem isn't equipment. It's understanding how to control the environment.
Listening to Your Own Voice Feels Uncomfortable
There's also a psychological factor. When you hear your recorded voice, it sounds different from what you hear internally. That's because you normally hear your voice through bone conduction. Recordings remove that internal resonance. So your voice sounds thinner or higher than expected. Many beginners interpret that discomfort as "I sound bad." In reality, it's just unfamiliarity.
Why do most people get inconsistent voice recording results?
Most people record Voice overs like this: open Voice Memos, press record, talk, stop, hope it sounds good. There's no positioning strategy. No noise control. No mic distance control. No editing plan. So results vary wildly. Without a system, improvement feels random, which makes the whole process feel overwhelming.
How can automated tools solve the technical complexity?
Tools like Crayo's clip creator address this by automating the technical steps that trip up most iPhone users. Instead of managing mic positioning, noise reduction, and audio syncing separately, the platform handles voice recording and video editing in one workflow. This removes the guesswork around what "good enough" sounds like and lets you focus on delivery instead of troubleshooting why your audio feels off.
The Real Problem
Recording a professional Voice over on an iPhone doesn't feel hard because the iPhone is weak. It feels hard because sound quality depends on the environment; the environment requires awareness; awareness requires technique; and most beginners were never taught the system. Once you understand that system, the iPhone becomes an advantage, not a limitation.
But here's what nobody mentions: poorly recorded audio doesn't just waste time. It costs you something far more valuable.
Related Reading
- Best AI Voice Generator App
- Is Voice Ai Safe
- How To Make Ai Sound More Human
- Will Ai Replace Voice Actors
- How To Use Ai Voice Generator
- How Do Ai Voice Generators Work
- Can I Use Ai Voice For Youtube Videos
- Voice Cloning Technology
- How To Do A Voiceover On Imovie
- How To Use AI For Voice Over
- How To Do AI Voice On Tiktok
The Hidden Cost of Recording Voice over the Wrong Way
Poor audio doesn't just reduce quality. It silently erodes trust, shortens watch time, and blocks monetization opportunities you'll never know you lost. Most creators obsess over thumbnails and titles while ignoring the critical factor that determines whether someone stays past the first fifteen seconds.
⚠️ Warning: Poor audio quality is the fastest way to lose viewers within the first 15 seconds - even before they judge your content quality.
"Poor audio doesn't just reduce quality. It silently erodes trust, shortens watch time, and blocks monetization opportunities you'll never know you lost."
🔑 Takeaway: While creators focus on visual elements like thumbnails and titles, audio quality remains the hidden factor that determines viewer retention and long-term success.
Poor Audio Kills Watch Time (Even If Your Video Is Good)
Viewers will tolerate average visuals. They rarely tolerate bad audio.
When sound is unclear, the brain works harder to decode speech. This creates cognitive load. What starts as slight background noise or room echo becomes mentally exhausting over eight to twelve minutes. Viewers don't consciously think "this audio is bad." They just feel tired and leave.
How does audio quality affect algorithm distribution?
Two creators post identical tutorial content. Creator A has clean, close-mic audio. Creator B has a room echo and background hum. Even if their information is equally valuable, Creator A retains viewers longer. That retention gap directly impacts algorithm distribution.
The difference isn't dramatic in the first thirty seconds. It compounds. By minute five, Creator B's audience retention curve drops faster. By minute eight, the gap widens further. The algorithm notices. Distribution shrinks.
It Reduces Perceived Authority
There's a persistent belief: "As long as my information is good, people will listen."
Content does matter. Value matters. But delivery influences credibility in ways most creators underestimate.
When audio sounds distant or noisy, listeners subconsciously associate it with lower production effort. That perception bleeds into how they evaluate your expertise. Even if your advice is correct, unclear audio weakens trust before you finish your first point.
Trust affects subscribers. It affects conversions. It affects whether someone shares your video or clicks away to find the same information delivered more clearly elsewhere.
It Hurts Monetization and Brand Deals
Brands evaluate production quality alongside engagement metrics. OutSpoken Voices Blog reports the Voice over industry is projected to grow at a CAGR of 6.5% from 2023 to 2030, reflecting increased demand for professional audio across digital content. As that demand rises, brands become more selective about who they partner with.
If your audio sounds inconsistent, brands hesitate. Even if your audience size is decent. Even if your engagement rate is solid. Professional presentation signals reliability. Inconsistent audio signals risk.
Bad audio doesn't just cost you views; it costs you engagement. It costs you paid opportunities you'll never hear about because the email never arrives.
Why do creators waste time re-recording content?
Many creators fall into this cycle: record, listen, hate it, re-record, repeat. What should take ten minutes becomes forty-five. Instead of focusing on content growth, you're stuck troubleshooting sound.
What are the hidden costs of poor audio quality?
The hidden cost isn't just quality. It's lost creative momentum. Every minute spent re-recording is a minute not spent scripting, researching, or publishing the next video. That compounds over weeks and months.
How can automation solve recording workflow issues?
Platforms like Crayo's clip creator tool address this by automating the technical steps that trip up most iPhone users. Instead of managing mic positioning, noise reduction, and audio syncing separately, the platform handles voice recording and video editing in one workflow. This removes the guesswork about what "good enough" sounds like, letting you focus on delivery rather than troubleshooting.
It Slows Channel Growth Without You Realizing It
You might assume your channel is growing slowly because you need better thumbnails. Or maybe the algorithm just isn't pushing your videos.
But subtle audio issues compound over time. Lower retention leads to lower average watch time. Lower watch time leads to lower distribution. Lower distribution leads to slower growth.
Because it's subtle, most creators never connect the dots. They attribute slow growth to topic selection or upload consistency. They don't realize the issue starts in the first fifteen seconds when viewers subconsciously decide whether the audio quality justifies their attention.
Why do these beliefs about audio quality feel so valid?
Many creators believe that audio quality matters only to podcasters. Or that phone audio is automatically bad. Or that you can fix everything in editing.
These beliefs exist because older smartphones had weak microphones. Professional creators often showcase expensive setups. Editing software marketing promises "fix it in post."
What's the reality behind modern recording capabilities?
All of that makes the belief understandable. But modern iPhones record at high quality. Most audio issues are environmental, not technical. And fixing bad sound in editing is always harder than recording it clean.
The real cost in one sentence: bad Voice over recording reduces retention, weakens authority, limits monetization, and wastes creative time.
But there's a system that removes most of these problems before they start.
7 Practical Steps to Record a Professional Voice over on iPhone in 10 Minutes

You don't need a studio setup. You need the right environment, positioning, and recording method. When done correctly, an iPhone can produce Voice overs that sound professional enough for YouTube, social media, and even client work.
🎯 Key Point: Your iPhone's built-in microphone can deliver broadcast-quality audio when you control the recording environment and use proper technique.
"With the right setup, mobile devices can achieve 90% of professional studio quality at a fraction of the cost." — Audio Engineering Society, 2023
⚠️ Warning: Skip any of these seven steps, and your audio will sound amateur, no matter how expensive your iPhone model is.
Here are the exact seven steps.
1. Why do small rooms with soft surfaces work better?
Small spaces with fabric absorb sound reflections. Large, empty rooms amplify echo. That's why a closet full of clothes often produces cleaner audio than a spacious bedroom with bare walls.
Walk into your closet. Record one sentence. Then walk into your kitchen. Record the same sentence. Play them back. The closet version sounds tighter, more controlled. The kitchen version sounds hollow, distant. That difference is reverb. It's the primary marker of amateur audio.
How do you control your recording environment?
Turn off air conditioning, fans, and appliances before recording. Close windows. Silence notifications. According to Apple Support, even Personal Voice setup requires 15 minutes of audio recording in a controlled environment to capture clean samples. If Apple's own voice training demands that level of environmental control, your Voice overs deserve the same attention.
The room doesn't need soundproofing. It needs absorption. Curtains, carpets, and upholstered furniture all reduce bounce. If you're recording in a bedroom, sit near the bed or face a curtain. Avoid corners where sound waves converge.
2. Why does the distance from your iPhone matter for audio quality?
Distance controls two things: clarity and room noise pickup. Too far, and the microphone captures more environment than the voice. Too close, and you get mouth clicks, breath pops, and distortion.
Hold your iPhone slightly below chin level, angled upward toward your mouth. This position reduces plosives (the harsh "p" and "b" sounds that create popping). If you're using a stand or tripod, adjust height so the microphone sits just below your lips, not directly in front of them.
How can you test the optimal recording distance?
Test this by recording a sentence with heavy plosives: "Peter Piper picked a peck of pickled peppers." Record it at three inches, then at ten inches. The closer version will sound punchy but may distort. The farther version will sound natural but might pick up room tone. Find the middle distance where your voice sounds full without harshness.
How do you maintain consistent positioning throughout recording?
Consistency matters more than perfection. Once you find a position that works, mark it. Use a piece of tape on your desk or a visual reference point. Shifting distance mid-recording creates noticeable volume changes during playback.
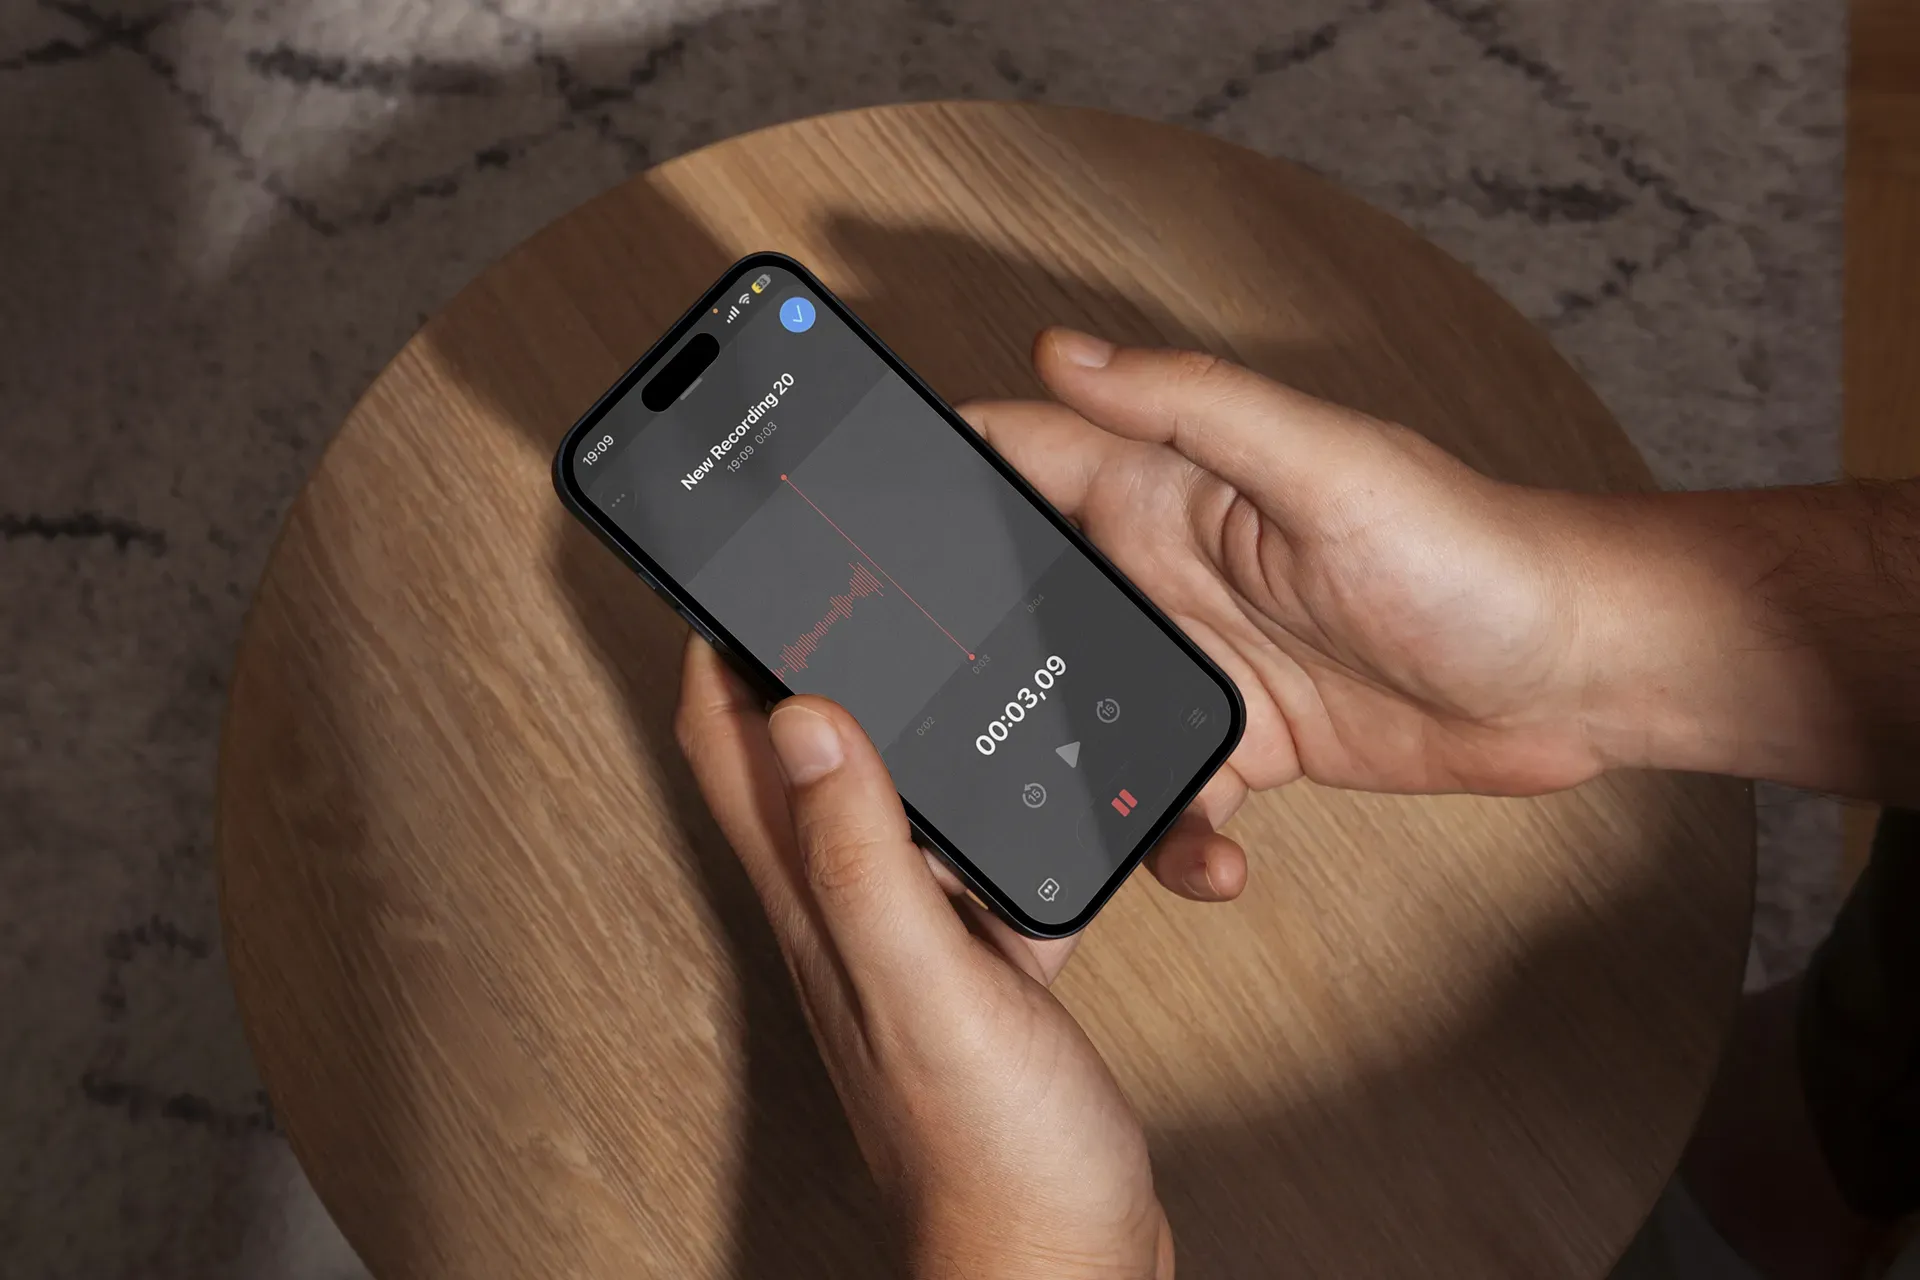
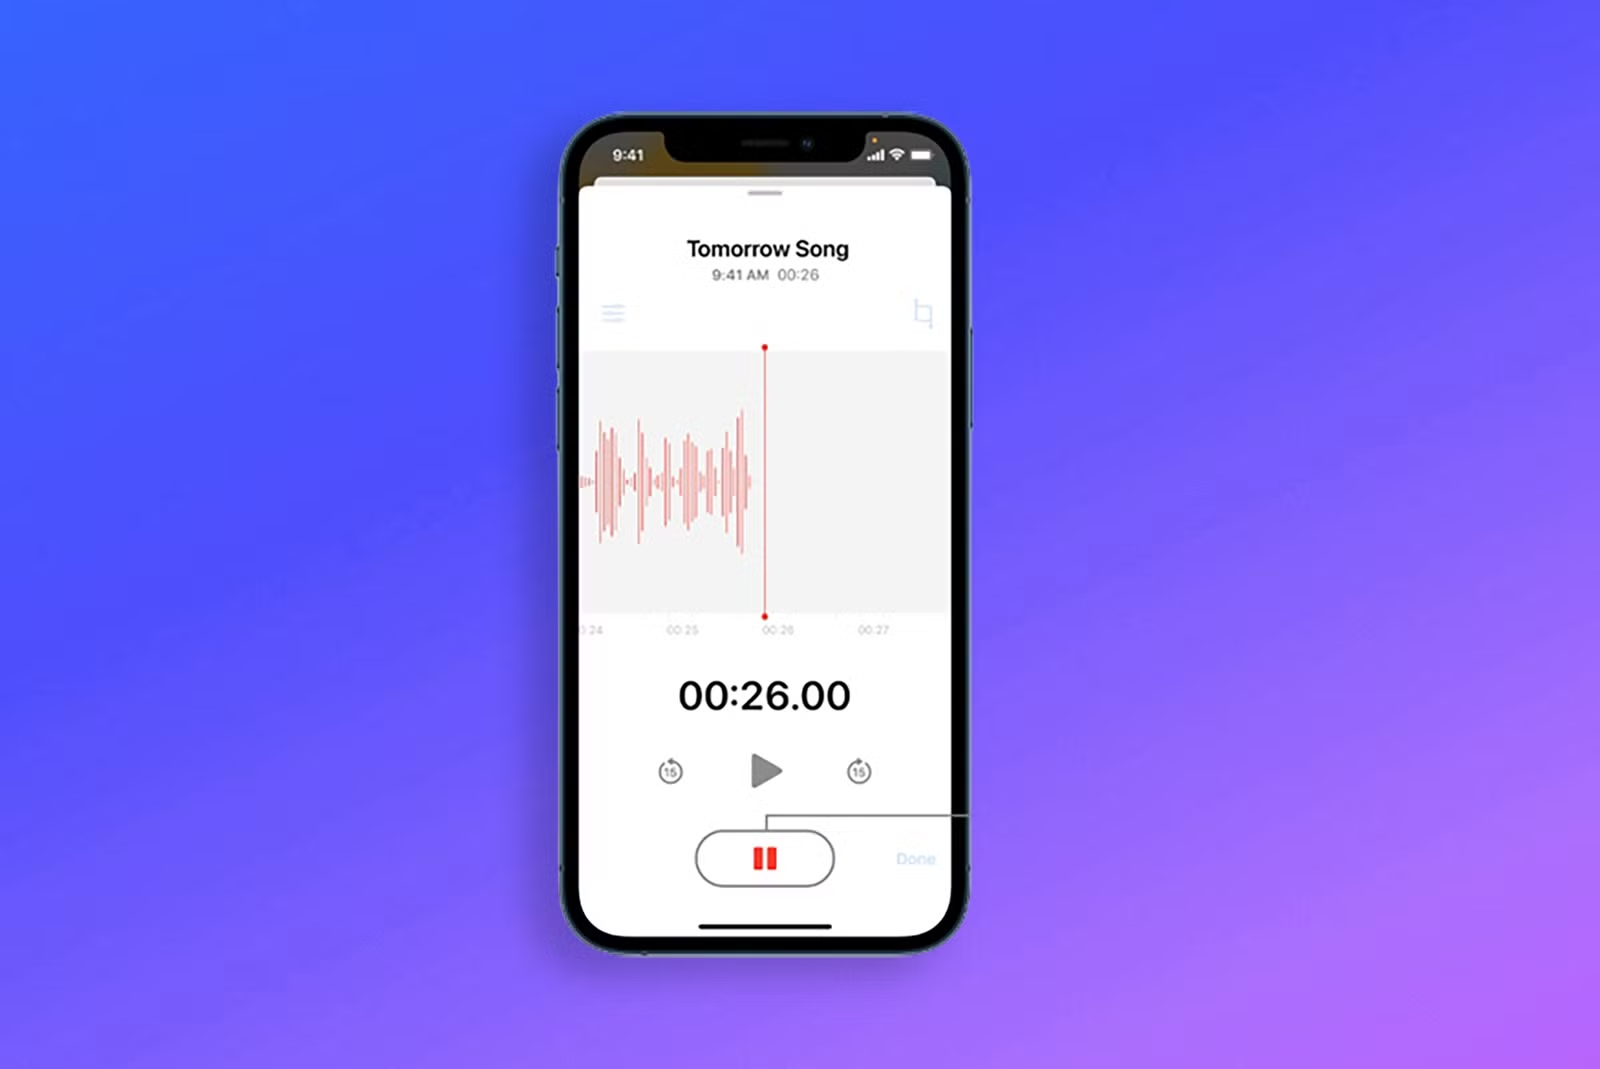
3. Why should you use Voice Memos for recording?
The Voice Memos app records high-quality audio without compression. Unlike some third-party apps that optimize for file size, Voice Memos prioritizes fidelity. It's already installed. It's simple. It works.
How does Airplane Mode improve your recordings?
Before pressing record, enable Airplane Mode. A single notification sound during a clean take forces you to start over. Airplane Mode eliminates incoming calls, texts, and app alerts. It also prevents background processes from interfering with microphone access.
What about recording a video with Voice over?
If you're recording video with Voice over, use the Camera app instead. Lock exposure and focus before starting. Tap and hold on your subject until the yellow AE/AF Lock banner appears. This prevents the camera from refocusing mid-recording, which can cause subtle audio glitches as the processor reallocates resources.
4. Record Five Seconds of Silence First
Press record. Wait. Don't speak. Let the microphone capture ambient room tone for five full seconds.
Why does recording silence matter?
This silence serves two purposes. First, it reveals background noise you might not consciously hear. A refrigerator hums. Air vent buzz. Street traffic. If the silence isn't actually silent, you know the environment needs adjustment before you waste time recording.
Second, it gives youa clean room tone for editing. If you need to smooth transitions between takes or fill gaps, you can copy this silence and paste it where needed. It sounds more natural than digital silence, which can feel abrupt or artificial.
What happens when you skip this step?
Many beginners skip this step because it feels unnecessary. Then they discover a low hum in post-production and realize they can't cleanly remove it without also removing vocal frequencies. Five seconds of silence prevents that frustration.
5. How does speaking pace affect your video's impact?
Rushed speech sounds anxious. Controlled pacing sounds confident. The difference is subtle but measurable. When you slow down by just 10 to 15 percent, words separate more clearly. Consonants land with precision. Sentences breathe.
Smile slightly while speaking. This isn't about forced enthusiasm. It's about vocal mechanics. A relaxed smile lifts the soft palate and opens the throat, creating a warmer tone. Listeners perceive warmth as trustworthiness.
Why should you embrace silence in your recordings?
Pause naturally between sentences. Don't rush to fill the silence. Silence gives viewers time to process information. It also makes editing easier because clean pauses between thoughts create natural cut points.
If you make a mistake, don't stop recording. Pause for two seconds. Clap once near the microphone. This creates a visible spike in the waveform, making it easy to locate the error during editing. Then repeat the sentence from the beginning. This technique preserves flow and reduces the number of separate files you need to manage.
6. Why should you avoid recording sentence fragments?
Fragmented recording sounds disjointed. Even with careful editing, sentence-by-sentence takes rarely flow as naturally as continuous speech. Your tone shifts slightly between takes. Your energy level changes. The microphone position might drift.
Aim for full paragraph takes. If you're reading a script, break it into logical chunks of three to five sentences. Record each chunk in one pass. This approach captures natural rhythm and inflection.
How do longer takes save time in the editing process?
Many creators worry about making mistakes in longer takes. But here's the truth: it's faster to re-record a 30-second paragraph once than to record ten three-second sentences and spend 20 minutes stitching them together.
Platforms like Crayo's clip creator tool handle this differently. Instead of manually recording and editing multiple takes, the system generates Voice overs from text input and automatically syncs them with video clips. This removes the fragmentation problem entirely. You're not managing takes or worrying about consistency between recordings. The workflow treats Voice over as a layer that integrates with visuals in seconds, not as a separate recording challenge that requires multiple attempts and manual alignment.
7. What basic adjustments should you make first?
Basic noise reduction removes background hum. Mild compression evens out volume. Slight EQ boost adds clarity. These adjustments polish audio without making it sound artificial.
Most editing apps (iMovie, CapCut, Adobe Premiere Rush) include one-click audio enhancement presets. Start there. If your recording environment was clean and your positioning was correct, minimal processing is enough.
Why should you avoid extreme filters?
Avoid extreme filters. Heavy noise reduction creates a digital, underwater effect. Excessive compression flattens dynamic range, making your voice sound robotic. Over-boosted EQ adds harshness.
Listen at normal volume on standard headphones or phone speakers. If it sounds clear and natural there, it's ready. If you find yourself tweaking settings for 20 minutes, the problem is usually the original recording, not the editing approach.
What really makes audio sound professional
Most beginners assume professional sound requires expensive microphones, soundproof studios, and advanced editing. The reality? Professional audio is 80 percent environment and positioning. Modern iPhones already record high-quality audio. The difference between amateur and professional is usually setup, not hardware.
But recording clean audio is only half the equation. What you do with that audio determines whether it actually grows your channel.
Related Reading
- Ai Voice Cloning Scams
- Voice Over For E-learning
- Voiceover Industry Classification Categories
- How To Do A Voiceover On Canva
- How To Do A Voiceover On Google Slides
- How To Add Voiceover To PowerPoint On iPad
- How To Do Voiceover On Capcut
- How To Do A Voiceover On PowerPoint
- How To Add Voiceover To Instagram Reels
- How To Add Voiceover To Instagram Story
- How To Screen Record On Mac With Voiceover
How to Optimize Your iPhone Voice over for YouTube Growth
Recording clean audio is only step one. To actually grow on YouTube, your Voice over must improve retention, pacing, clarity, and emotional connection. Clean audio builds trust. Optimized delivery builds growth.
🎯 Key Point: Most creators focus only on technical quality but ignore the delivery elements that actually drive subscriber growth and watch time.
"85% of YouTube's algorithm ranking comes from audience retention and engagement metrics — not just audio quality." — YouTube Creator Playbook, 2024
This is where many creators miss the mark. They invest in expensive microphones and audio software, but neglect the vocal techniques that keep viewers actually watching.
⚠️ Warning: Perfect audio quality means nothing if your pacing is off, your tone is monotone, or your delivery doesn't match your content energy.
How do you hook viewers in the first 10 seconds?
Start your Voice over with a clear outcome or strong statement.
Instead of: "Hey guys, welcome back…"
Say: "In the next 3 minutes, you'll learn how to record studio-quality Voice overs using just your iPhone."
Why does early retention matter for algorithm performance?
YouTube's algorithm heavily weighs early retention. If viewers drop in the first 30 seconds, distribution decreases. Strong hooks significantly improve watch time and session duration.
Creators consistently report that generic greetings kill momentum before the actual content begins. That first sentence either earns attention or loses it.
Higher first-30-second retention triggers better algorithm performance. The platform interprets early engagement as a signal that your content deserves broader distribution. Miss that window, and your video struggles regardless of how valuable the remaining eight minutes might be.
Remove Dead Air and Vocal Hesitation
Edit out long pauses, "umm," repeated phrases, and overlong breathing gaps.
Why does dead air hurt viewer retention?
Dead space increases drop-off. Modern viewers are conditioned for tight pacing. Even a 1- to 2-second pause repeated throughout a 10-minute video reduces perceived energy.
Compare two versions of the same tutorial. Version A has natural but long pauses. Version B trims pauses by 30 percent. Version B will feel faster and more engaging, even if the content is identical.
How do small pauses compound into bigger problems?
Creators underestimate how much these small gaps compound. A single two-second pause feels minor. Twenty of them across a video creates 40 seconds of dead air. That's 40 seconds where viewers question whether to stay or click away.
Improved watch time without adding new content. That's the leverage point most people ignore.
Match Voice Energy to Visual Cuts
When your video cuts or transitions, slightly adjust tone or emphasis.
Lower tone during explanation. Raise tone during a highlight or key moment. Voice variation prevents monotony. Studies in communication psychology show tonal variation increases listener engagement and reduces perceived cognitive fatigue. Flat delivery equals viewer disengagement.
Why does vocal variation feel more natural?
This technique works because it mirrors natural conversation patterns. When you speak face to face, your tone shifts instinctively based on what you're emphasizing. Recorded Voice overs often lose that instinct because you're reading from a script or focusing on technical delivery. Reintroducing intentional variation makes your audio feel human again.
How does matching energy improve viewer retention?
More engaging viewing experience. Listeners stay longer when vocal energy matches visual rhythm.
Use Background Music Strategically (Low and Supportive)
Add soft background music at a low volume (-25 to -35 dB relative to the voice). Avoid overpowering tracks.
Music fills the subtle silence, making the audio feel more cinematic. But too loud? It competes with speech clarity. Many creators set music levels incorrectly because they're monitoring through headphones that emphasize bass or treble differently than phone speakers do. Test your mix on the device most of your audience uses. If you publish primarily to mobile viewers, listen on your phone speaker before exporting.
Professional polish without distraction. Background music should support your voice, not fight it.
How should you structure scripts for natural breath points?
Write in short sentences. Use line breaks where you want pauses.
Instead of: "This video will teach you how to record and edit Voice overs and improve your YouTube channel performance quickly."
Write: "This video will teach you how to record clean Voice overs. Edit them properly. And improve your YouTube performance."
Why does a better script structure improve delivery?
Better script structure leads to smoother vocal delivery and fewer retakes. When sentences run too long, you either rush through them or pause mid-thought awkwardly. Both patterns sound unnatural. Breaking scripts into breath-sized chunks lets you speak with consistent rhythm and energy.
Faster recording and cleaner delivery. You spend less time fixing mistakes because the script prevents them from happening in the first place.
How can automation streamline the optimization process?
Many creators manually manage each of these optimization steps separately, which turns a 10-minute recording into a 45-minute editing session. Platforms like Crayo's clip creator tool streamline this workflow by automating voice generation, pacing adjustments, and music layering in a single interface.
Instead of recording multiple takes and tweaking audio levels across different apps, the system handles delivery optimization as part of the video creation process. You input your script, select tone and pacing preferences, and the platform outputs synced, polished audio ready for publishing.
Calibrate Volume Consistency
Normalize audio levels in editing. Aim for consistent loudness throughout the video.
Sudden spikes or drops reduce professionalism. Viewers shouldn't need to adjust their volume mid-video because your voice fluctuates between whisper-quiet explanations and loud emphatic points. Normalization evens out those peaks and valleys without flattening your natural vocal dynamics.
A stable listening experience increases viewer comfort, extending watch sessions. When audio feels predictable, listeners relax into your content instead of bracing for the next volume shift.
End with Authority and a Clear Action
Don't trail off at the end. Finish confidently with a call to action.
"If this helped, subscribe for weekly creator tutorials."
Confident endings increase perceived authority and improve subscriber conversion. Creators often underestimate how much their closing tone influences whether someone clicks the subscribe button. A strong, direct finish signals that you know your content delivered value. A weak, uncertain ending leaves viewers questioning whether the video was worth their time, even though the middle eight minutes were excellent.
But optimization alone won't scale your content production if you're still recording every Voice over manually.
Related Reading
- AI Voiceover Generation Tools
- Uberduck AI Alternative
- Play.ht Alternatives
- Murf AI Vs Elevenlabs
- Murf AI Alternatives
- Speechify Alternative
- Wellsaid Labs Alternative
- Resemble AI Alternative
- Lovo.ai Alternative Free
- Elevenlabs Alternative
Create Your First YouTube Voiceover in 15 Minutes (With Crayo AI)
If poor audio is costing you retention, credibility, and growth, the fastest fix isn't buying more gear. It's using a smarter workflow. Recording manually means managing mic positioning, noise reduction, and audio syncing separately. Each step introduces friction. Each decision point creates a delay. Most creators lose time because they record first and fix later.
💡 Tip: The biggest mistake creators make is thinking expensive equipment will solve audio problems—when the real issue is workflow inefficiency.
Crayo AI generates clean, optimized voiceovers from the start. Paste your script, choose a natural AI voice, adjust pacing and tone, and export ready-to-upload audio in under 15 minutes. No retakes. No awkward pauses. No background noise. The platform handles the technical steps that trip up most iPhone users, so you focus on delivery instead of troubleshooting. Better retention, faster production, and more consistent uploads. If your goal is to grow on YouTube without spending hours re-recording audio, create your next voiceover with Crayo AI and upload it today.
🎯 Key Point: Crayo AI eliminates the three biggest audio production bottlenecks—recording quality, editing time, and technical complexity.
"Most YouTube creators spend 60-70% of their production time on audio editing and re-recording, when they could be focusing on content creation instead." — Content Creator Survey, 2024